If you are a shutterbug, you may want a projector to take creative and artistic photos just like the fake window challenge on social media. In this guide, I will share the top 6 projector photography tips for you, helping you take creative and artistic photos.
Top 6 Tips for Projector Photography
Here are 6 tips on projector photography to help you to take satisfying photos using a projector.
Projector Photography: Select Colorful Background Pictures
You can select a colorful picture as the projection image to make the image brighter. If the image on your projector is bright enough, the color of the projection image can cover you well. The image looks more integrated and lifelike.
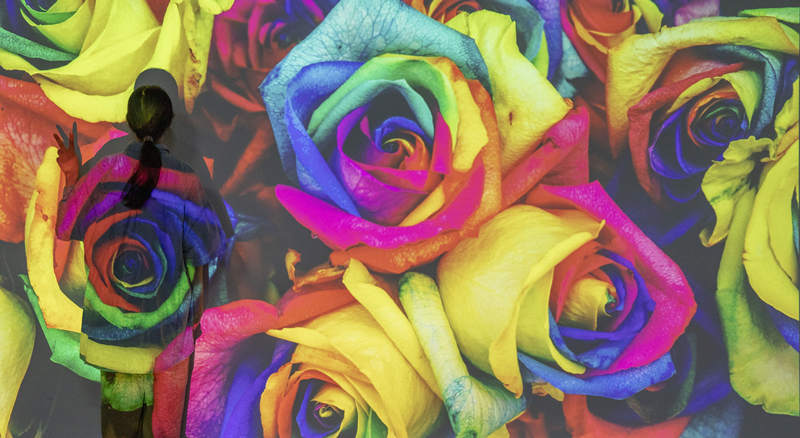
In the image above, the rose projected on the back of the model is integrated with the projection image.
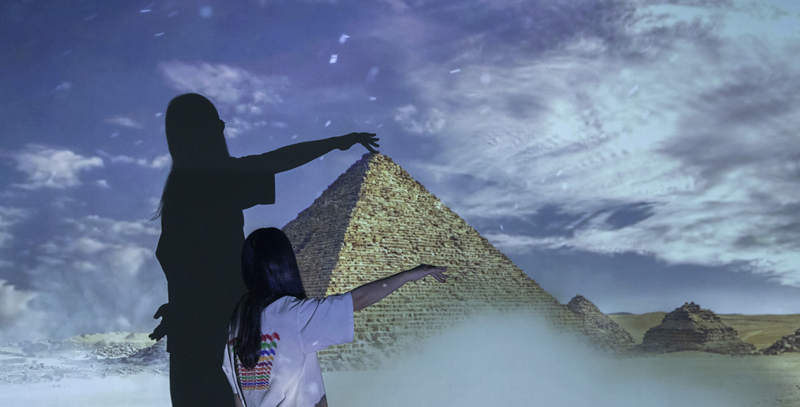
Projector Photography: Use Background Pictures of Famous Tourist Spots
An image of a worldwide famous tourist spot makes your image more interesting and creative. You can easily touch the peak of the Pyramids of Egypt in the projection image. Then, you can adopt any other relaxed pose for you in front of the image.
Projector Photography: Make Use of Shadow
When the light projects on you, your shadow will appear on the projection image. You can also use your fingers to show any other patterns on the projection image. Then, a creative photo comes into being.
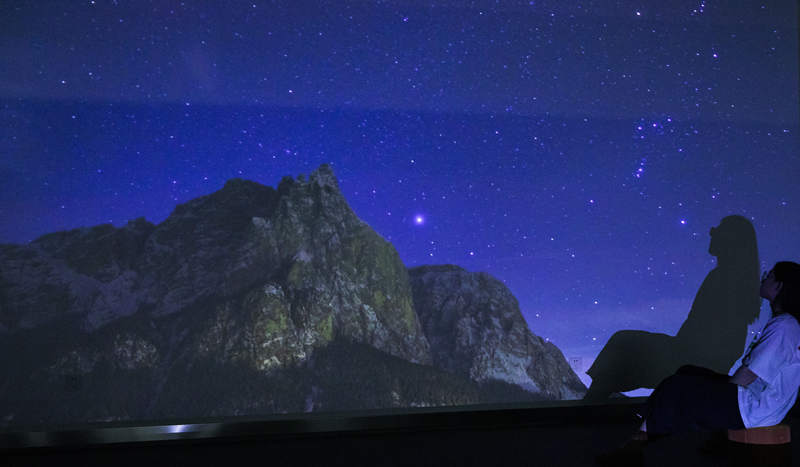
If you are projecting an image of moon night, your shadow makes the photography better.
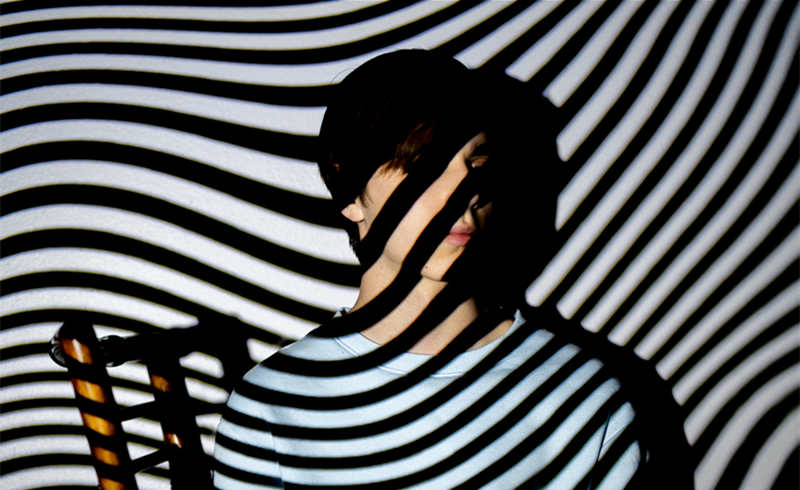
Projector Photography: Make Use of Lines or Words
The lines or words on the projection image can make your projector photography creative and cool When you walk in front of the projector light source but don’t look directly at the light source, The lines or words on the projection image will project onto your body. Then, your photographer can take a cool photo easily.
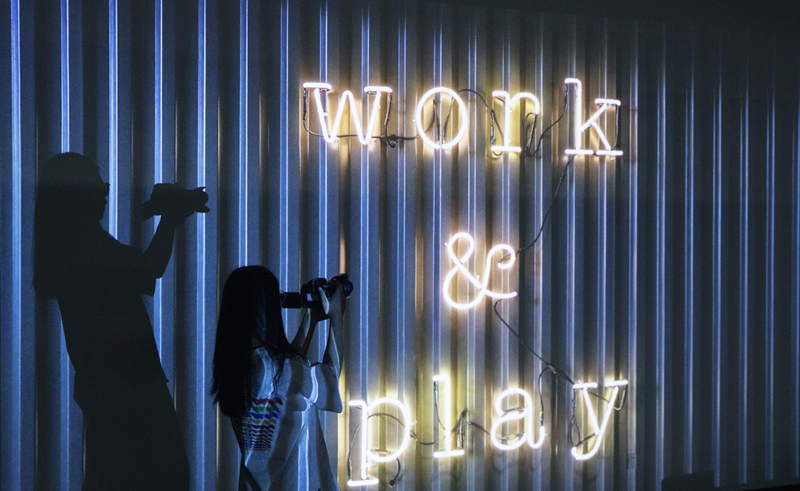
Photos with trendy lines or buzzwords can catch more attention when you post the photo on your social media platform. The photo with film lines or buzzwords will resonate with people and catch more attention. An image with creative strips or wave lines is also suitable for projector photography.
Projector Photography: Use Blurry Effect
Sometimes, you can use the bokeh effect or other blurry effects to make the image more natural and harmonious. The blurry effect can build a hazy and dim effect, which can lower the boundaries between you and the projection image.
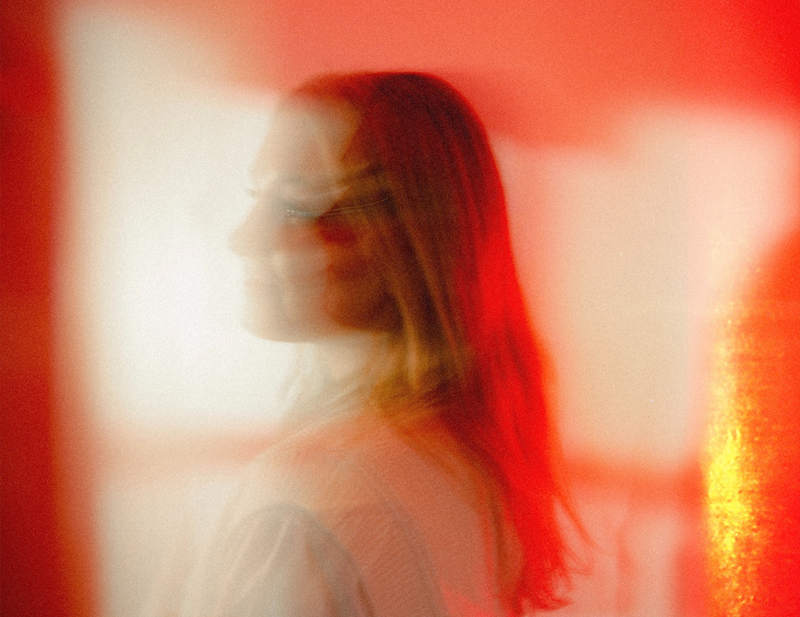
Let your photographers walk around and take creative and artistic images. You can also use the slow motions of the camera to build a blurry effect.
Projector Photography: Use Contrast
You can move far the projector and project a big image and build a contrast of big and small. Then, the image will be much more eye-catching.

In addition, the color of contrast is also useful when you take photos with a projector.
How to Select a Good Projector?
A good projector for projector photography should satisfy the following 3 characteristics, good color, good brightness, and a large screen. Of course, the resolution, storage, connectivity, and memory are also important parameters of a good projector.
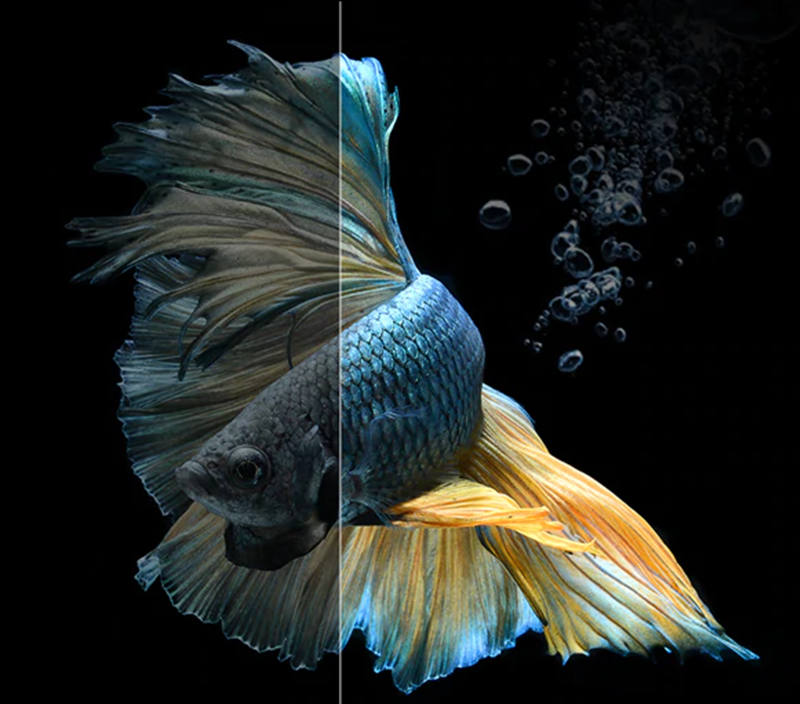
Projector Color
A projector with good color brings colorful and sharp projection images. Generally, projector manufacturers will label color gamut on their projector specification, for example, the common mainstream color gamut standards, REC 709, REC. 2020, and DCP P3. Among the 3 color gamut standards, REC. 2020 covers the largest area in visible color space. The degree of color gamut is generally described by a percentage, for example, 80% DCI P3, and 100% REC. 2020.
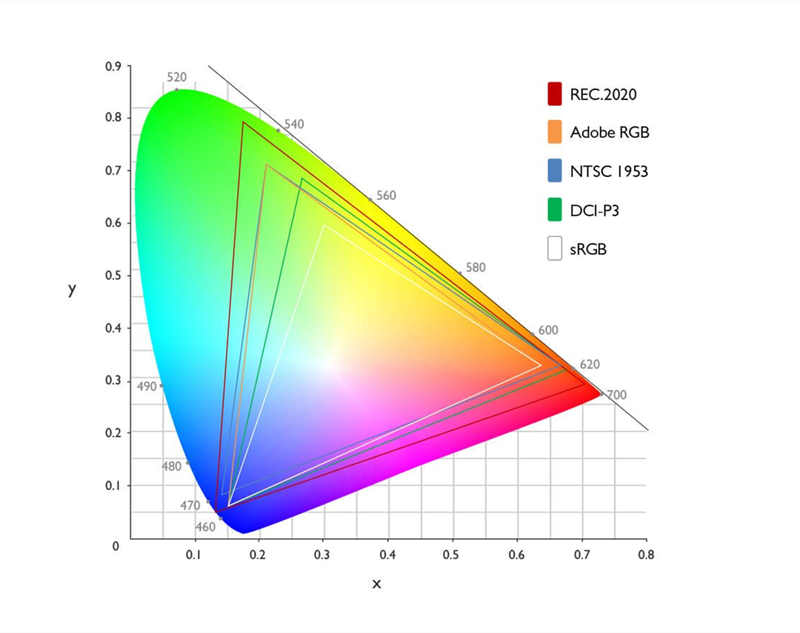
Put it simply, REC. 2020 covers more visible colors. For example, projector A has a color gamut of 98% DCI P3, and Projector B has 98% of REC. 2020, then the color gamut of projector B is better.
Projector Brightness
The brightness of a projector determines the brightness of the projection image. The internationally recognized unit of projector brightness is ANSI lumen and ISO lumen. If the unit is the same, the bigger the lumens figure, the brighter the projector.
For example, if Projector A is rated at 1,000 ANSI lumens while projector B has 2,000 ANSI lumens, then we can know that projector B is brighter.
It is worthy to note that there are many lumen units to perplex consumers in the projector market. You can classify and convert different lumens units with the lumens to ANSI lumens calculator.
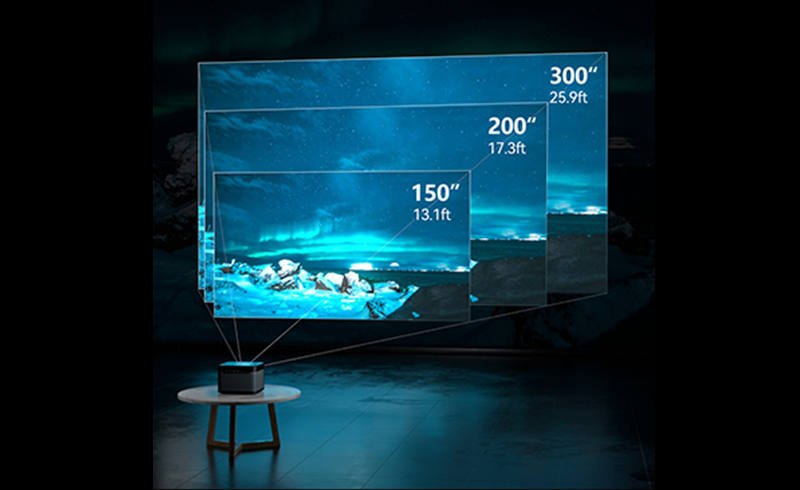
Projector Screen Size
The screen size of a projector influences the layout and scene of your projector photography. To make your projector photography creative and eye-catching, the projector should project a big screen size. Most projectors on the market have a max screen size of 150 -200 inches. If you want a bigger screen size, you can choose a projector with 300 inches.
Projector Photography Warm Tips
These tips below help you solve the problems when you take photos with a projector.
- You can’t look directly at the light source of a projector because it is harmful to your eyes.
- Build a dark environment to improve the image effect. You can turn the strong light off or close the curtain to build a dark environment.
- To make the image bigger, you can move the projector farther from the projection wall or screen.
- The projection wall should be tidy enough. A wall without any decorations such as light, socket, or photo frame is preferred.
Related Posts
Projector Buying Guide 2022
Best Projector for Outdoor Movies
Top 6 Best Gaming Projectors for 2022
How Much Does a Projector Cost?