You can use the Epson EH-LS12000B projector’s Quick Corner setting to correct the shape and size of an image that is unevenly rectangular.
Correcting the Image Shape with Quick Corner
1. Turn on the projector and display an image.
2. Press the [Menu] button on the control panel or remote control.
3. Select the Installation menu and press [Enter].
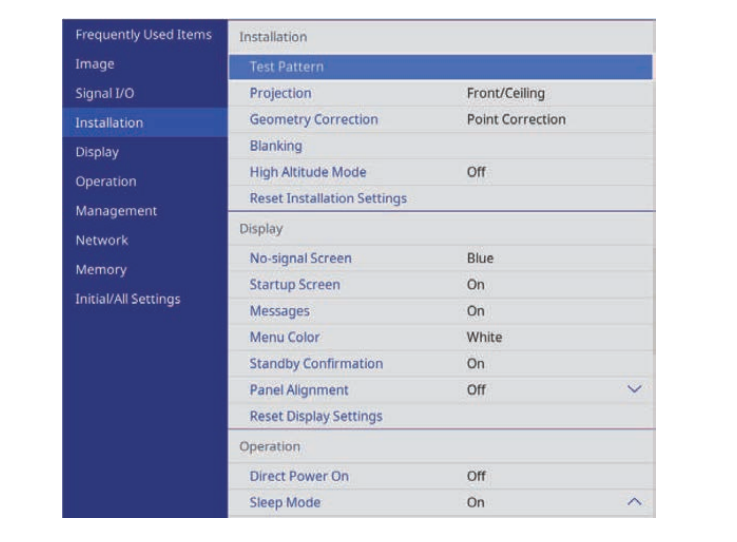
4. Select Geometry Correction and press [Enter]. You see the Geometry Correction screen.
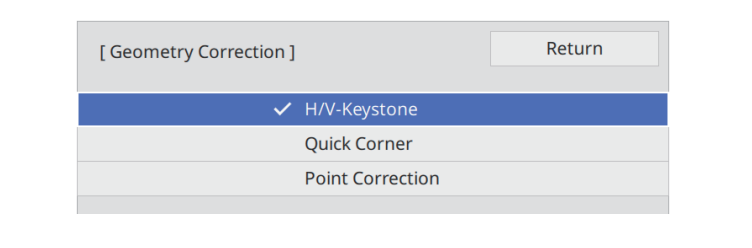
5. Select Quick Corner and press [Enter]. Then select Yes and press [Enter] if necessary. You see the area selection screen.
6. Use the arrow buttons to select the area of the image you want to adjust. Then press [Enter]. To reset the Quick Corner corrections, hold down [Esc] for about 2 seconds while the area selection screen is displayed, and then select Yes.
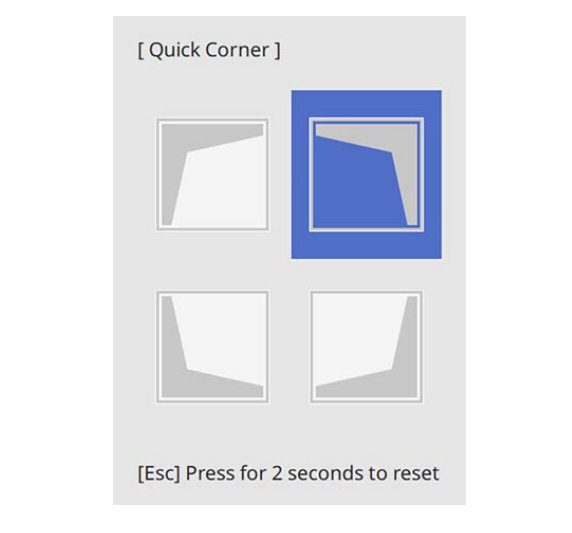
7. Press the arrow buttons to adjust the image shape as necessary. To return to the area selection screen, press [Enter].
8. Repeat steps 6 and 7 as needed to adjust any remaining corners. i When you are finished, press [Esc].
The Geometry Correction setting is now set to Quick Corner in the projector’s Installation menu. The next time you press the arrow buttons on the control panel, the area selection screen is displayed.
Read more:
Epson EH-LS12000B Projector Remote Installing Tip