Mounting a ceiling projector can transform your home theater or presentation setup into a professional and space-saving experience. Whether you’re a movie enthusiast or frequently conduct business presentations, properly installing a ceiling projector can enhance your visual experience. In this guide, we’ll walk you through the step-by-step process of mounting a ceiling projector.
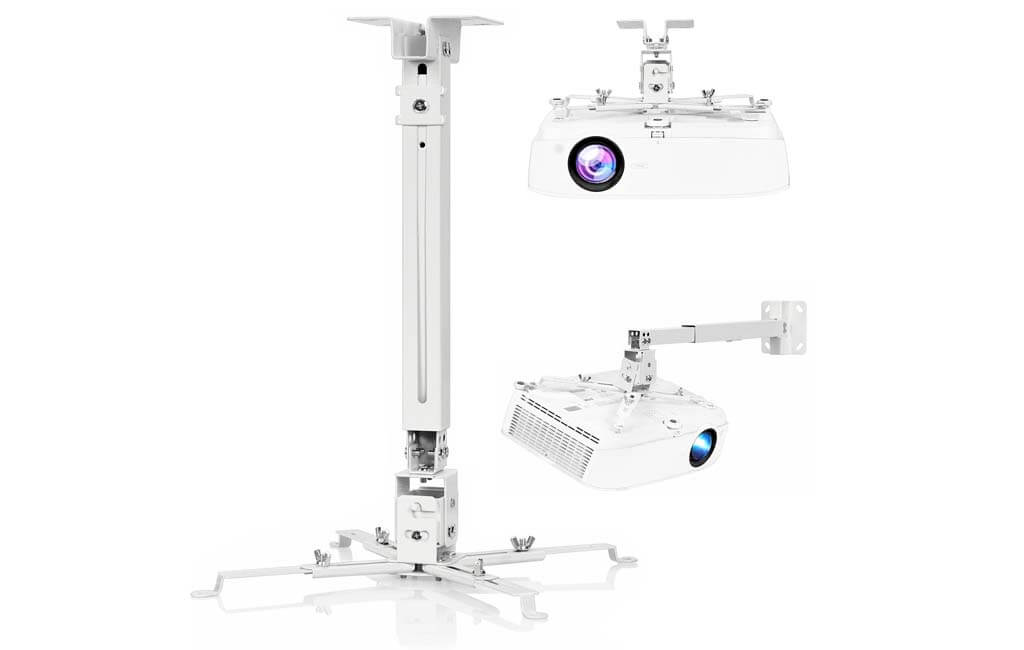
Step 1: Gather the Necessary Equipment
Before you begin, ensure you have all the required equipment. This includes the projector mount kit, a ladder, a power drill, screws, anchors, a stud finder, a level, and a measuring tape.
Step 2: Choose the Ideal Location
Selecting the right spot for your projector is crucial. Ensure it’s centered with the screen or projection area. The projector should be perpendicular to the screen to prevent distortion. Use a stud finder to locate a ceiling joist for a secure mount.
Step 3: Assemble the Projector Mount
Follow the manufacturer’s instructions to assemble the projector mount. This usually involves attaching arms, brackets, and adjusting the angle.
Step 4: Mark the Mounting Points
Hold the mount against the ceiling and mark the spots where you’ll drill holes. Double-check the alignment and use a level to ensure accuracy.
Step 5: Drill Holes and Insert Anchors
Using a power drill, create holes in the marked spots. If the holes don’t align with ceiling joists, insert anchors for added support.
Step 6: Attach the Mount
Securely attach the mount to the ceiling by screwing it into the drilled holes or anchors. Make sure it’s tightly fixed to prevent any wobbling.
Step 7: Adjust the Angle
Depending on your projector’s features and the desired projection angle, adjust the mount’s arms or brackets to achieve the perfect projection.
Step 8: Connect Cables
Carefully thread the necessary cables (HDMI, power, etc.) through the mount and down to your media source.
Step 9: Attach the Projector
Carefully place your projector onto the mount and secure it according to the mount’s instructions.
Step 10: Test and Fine-Tune
Power on your projector and check the projection alignment. Use the projector’s built-in adjustment settings and the mount’s flexibility to fine-tune the projection.
Conclusion
Mounting a ceiling projector may seem daunting, but with the right tools and steps, it’s a manageable task that can greatly enhance your viewing or presentation setup. Ensuring the projector is securely mounted, aligned correctly, and properly adjusted will result in a rewarding and immersive experience. Whether it’s movie nights or professional presentations, a well-mounted ceiling projector can make a significant difference.