How to correct keystone distortion of Sharp/NEC PE506UL’s Image, you may follow this guide.
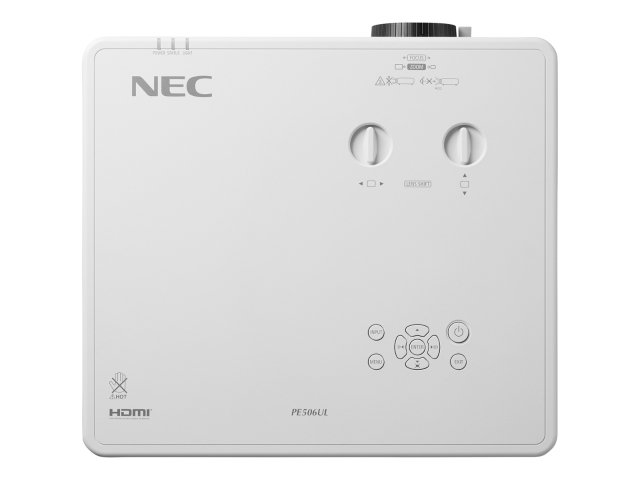
- Press the ▼ button on the projector cabinet. The H/V keystone screen will be displayed on the screen. Press the KEYSTONE button when using the remote
control. - Press the ▼ button to select H/V keystone, then press the ENTER button to select the H keystone. And press the Right/Left button to make adjustment so that
the left and right sides of the projected image are parallel. Adjust the horizontal keystone distortion.
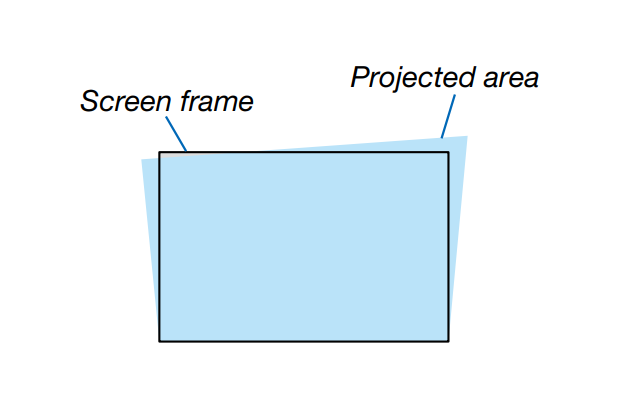
- Align the left (or right) side of the screen with the left (or right) side of the projected image. Use the shorter side of the projected image as the
base. In the right example, use the left side as the base.

- Press the ▼ button to select V KEYSTONE and then use the ▲▼ button so that the top and bottom sides of the projected image are parallel. Adjust the vertical keystone distortion.
- Repeat steps 2 and 4 to correct keystone distortion.
- After completing Keystone correction, press the EXIT button for some time to turn off the menu.
Read more:
Sharp/NEC PE506UL Keystone Correction Setup Tip
Sharp/NEC PE506UL Lens Shift Using Guide
Sharp/NEC PE506UL Quick Setup Guide