GooDee BL98 is compatible with multiple devices, including computers. This post will tell you how to connect the projector to a computer. Here are the detailed steps.
1. Connect the computer to the projector with the HDMI cable (A Mini DisplayPort to HDMI adapter is needed for the Apple MacBook computer).
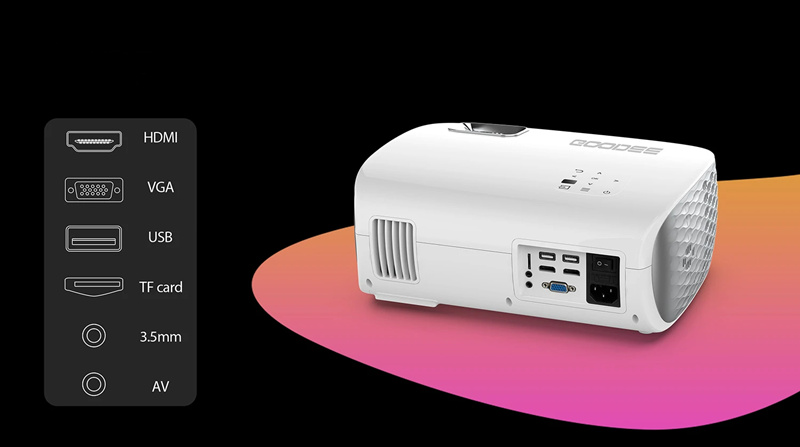
2. Click the [SOURCE] button, and select the corresponding [HDMI1] / [HDMI2] input.
3. Connect to your computer and set the display resolution and frequency to 1920×1080 and 60 Hz, respectively.
4. The computer’s image output mode should be checked when the projector’s input channel is set to HDMI/VGA. Press [F1 – F12] while holding down the FN key to choose the duplicate image mode.
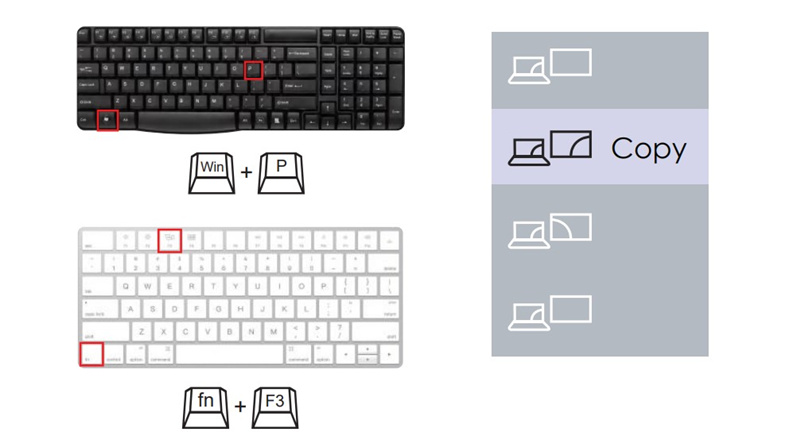
Common key commands are as follows:
(FN+F5) for Toshiba, Sharp, and Acer;
(FN+ F7) for IBM, Hitachi, and BenQ;
(FN+ F4) for HP and NEC;
(FN+ F3) for Lenovo, Founder, Samsung, and Panasonic;
(FN+ F8) for Apple and Dell; (FN+ F9) for Asus.
Related Posts
GooDee YG600 Factory Reset Guide
How to Watch Netflix on GooDee YG600?
How to Connect GooDee YG 600 to Phone?